


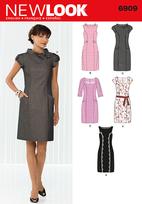

I want it sleeveless, and it will be lined. The number of pattern pieces will influence my choice. What do you all think? Or do you know of a better pattern????
 I chose to work with Butterick 5333 because of:


 Someone else gave me the Sunshine Award a while ago (so sorry I can't remember who did, but I never got around to posting it. I just treat them as one award to get it taken care of. I think that I have to tell ten things about myself, and then select 5 other blogs upon which to bestow the awards. Here goes:
Your dresses are really pretty and i have enjoyed reading your blog for some time. I've recently moved to Warner Robins from upstate NY and have been very disappointed that there is not much of a selection of fabric stores here. I still like to touch my fabrics before purchasing and really miss doing that. I was shocked that you mentioned Warner Robins...is that here in Georgia? I'm interested in finding some sewing buddies that enjoy making clothes...not crafts.
Cecil you mentioned that you recently moved to Warner Robins from upstate NY, and later asked if Warner Robins is in Georgia....
 See, don't you think I need much, much more - like maybe two more drawers full - then I think I'd be happy!!!!
 Simple, yes! Fits well and comfortable. An easy to take care of, jump in and go dress that no one else in town has, that makes the wearer proud!!!

 Will I make another one? Not quite sure, although I do like the look and fit of the dress. I might make it again if I need a super quick project other than a top.
 which I still find myself tweaking. The last time I used this pattern I adjusted the crouch. This time I decided to go down a size because previous pairs were just too big on me. I had to finally realize that I am not size 20 in the hip area. In using this pattern before, I cut the larger size and just increased the seam allowances to fit. I decided that trying scale down the larger size was just creating too much work. Fitting fear has me bound. I always figure you can always decrease, but it's not always possible to increase the size. I'm just afraid of making the pants too small and wasting my fabric.

 JALIE REVIEW: As I said before, I've seen this pattern all around sewing blogland. Although I've never sewn a Jalie before, the popularity made me lust after the pattern (I'M SURE YOU'VE RECOGNIZED THAT I AM A PATTERN HOG!). A quick review of the pattern instructions left me feeling a little intimidated at first, but I also felt compelled to take the challenge. While making the top I was reminded of a Bisquick Impossible Pie - the ones in which the crust miraculously rises to the top. During the construction I remember thinking "it will be a miracle if this works"...and so it was, because it did indeed work out.
 This time I just topstitched the neckline, arm hole area, and the keyhole area. The last time I made this dress I understitched the entire thing per pattern instructions and it was quite a miserable experience. Although I enjoy the benefits of understitching, when the pattern instructions tell you to understitch as far as you can go, right then and there you know it's going to be a difficult procedure.
 I guess the pattern knew that I have the next two days and three nights off, so it has been softly calling my name all day long. I guess taking the instructions to peruse at lunch today did nothing more than heighten the anticipation of getting home to the SEWING CAVE. You must know by now that I have a serious affinity for tops - and better yet, a knit top.
 Butterick 5456 - I wore the first one I made yesterday and I love this dress, it's so comfortable.
 It's been a great Sew-A-Long! It is so nice to interact with other sewists from all over the place. We've shared pattern/fabric choices, techniques, ideas and style. Here's a few sew-a-long stats:
...for years February has been set aside as a special time to learn about and recognize accomplishments of African Americans and other peopl...


